Showing posts with label dessert. Show all posts

Monday, October 31, 2016

Halloween Treats!

A lot of people know that Halloween is my favorite holiday of the year. I love everything about it from pumpkins to costumes to candy and more, this holiday is so much fun. I went to a few costume parties this weekend, but I'm planning on spending my Halloween watching scary movies and giving trick or treaters candy with some of my friends.

My unicorn pumpkin and my boyfriends driving skeleton pumpkin.

To spice the movie night up, I made a few really spooky treats, because what better way is there to celebrate Halloween than with Halloween themed snacks?

Starting out with these simple take on cheese and crackers with these string cheese witches broom sticks.


I simply took sticks of string cheese and cut each one into 3 equal pieces. Then I cut each piece vertically to look like strands on a broom. Lastly I cut into those pieces twice horizontally to make the piece of cheese look frayed and more like an actual broom. I added a pretzel stick on top for the handle and voila, a broomstick!


The next snack on my party list are these super cute jalapeño popper mummies!

Find this recipe at the bottom of this post.
They're made with roasted jalapeños, cream cheese, cheddar cheese, and olives for the eyes.


Finally I made these adorable and extremely delicious spider cookies! They're basically snickerdoodle kiss cookies, but with a mini Reese's cup instead of a Hershey's kiss. 

Recipe at the bottom of this post.

However you are celebrating today and even if you're not, these snacks can be altered for any occasion. Cook away!


Mummy Jalapeño Poppers

Ingredients:

  • Crescent rolls or puff pastry
  • 10 jalapeño peppers halved lengthwise and seeded
  • 8 ounces cream cheese
  • 8 ounces grated pepper jack cheese
  • 1 green onion, finely chopped
  • Black olive slices for eyes
Directions:
  1. Halve and seed the jalapeño peppers.
  2. Combine the two cheeses and green onions and mix well.
  3. Fill the mixture into the jalapeño pepper halves.
  4. Use a pizza cutter to slice strands of the dough. Wrap the strands of dough around the jalapeños to resemble a mummy. Leave space for the olive eyes.
  5. Bake at 400 degrees for 8-10 minutes until golden brown.
  6. Remove from oven and immediately press olive slice eyes in the spaces for the eyes.

Spider Snickerdoodle Cookies

Ingredients:
  • 1/2 cup shortening
  • 1/2 cup peanut butter
  • 1/2 cup brown sugar
  • 1/2 cup sugar
  • 1 egg
  • 2 tbsp milk (I used almond milk)
  • 1 tsp vanilla
  • 1 3/4 cup flour
  • 1 tsp baking soda
  • 1/2 tsp salt
  • 1/4 cup sugar (for rolling)
  • Mini Reese's cups, frozen
  • Candy eyes
  • Melting chocolate or frosting in a tube
Directions
  1. Preheat oven to 375 degrees.
  2. In a large bowl, beat together shortening, peanut butter, egg, sugar, brown sugar, vanilla, and milk.
  3. In a medium bowl, whisk together flour, baking soda, and salt.
  4. Gradually add dry mixture to wet mixture and beat until blended.
  5. Form into 1 inch balls.
  6. Roll in sugar and place a couple of inches apart on ungreased cookie sheet.
  7. Bake 10-12 minutes or until golden.
  8. Immediately, gently press an upside frozen Reese's cup on top of each cookie and move to wire rack to cool.
  9. After placing and moving all the cookies on the wire rack, put in place the candy eyes while chocolate is still slightly soft.
  10. Place in refrigerator for 10 minutes to allow cookies to firm.
  11. Melt chocolate in a bag and cut the corner to pipe the spider's legs on to the cookie. I used frosting in a tube.
  12. Place in refrigerator for 10 minutes to allow legs to set.

Wednesday, May 4, 2016

Odys + Penelope.

 I try to have a girls' night with my best friend, Natalie, every month or so, and she's the perfect date, because she always wants to try out new places and sample and share a few things off the menu, which is exactly what I like to do! Last week, she and I ventured to the restaurant Odys + Penelope on La Brea for a night out.

Odys + Penelope is a churrasco (grilled meat) style restaurant, known for their wood fired smoker and open grill in the heart of the restaurant. Most of their menu items are focused around smoked ingredients and are fired in the wood oven. The restaurant is run by Quinn and Karen Hatfield, who are also behind The Sycamore Kitchen. The design inside is very minimal, but it somehow gives it a certain charm. I especially liked that they had a long wall shelf of firewood, ready to be put into the wood fire oven.


We got to the restaurant a little earlier than our reservation, so we started out by having a couple of drinks by the bar. I'm really into mixed whiskey or bourbon drinks, so I ordered this drink that was comprised of bourbon, blackberries, bitters, and amaro. I think the drinks are seasonal so my drink may not always be on the menu, but judging by the taste I had of my friend's drink, you won't go wrong ordering any of them.


So we began ordering a few starters. First, was the fried wild mushrooms with Persian garlic sauce. To be honest, I anticipated these being more crispy than they were. They were still really tasty, but a bit soggy. I absolutely could not get enough of the Persian garlic sauce. Coming from a Persian-Armenian background and knowing a lot about Persian food, I have no idea what makes this sauce Persian, but who cares? It was delicious! The dried, candied lemon garnishes were also actually really tasty.


My girl and I can never say no to fries, so we ordered some of those too. They were seasoned with za'atar, a Mediterranean spice that's really tangy and lemony. We both like dipping our fries in ranch, but the yogurt aioli that was paired with the fries was a really great compliment to them.


I think my favorite appetizer we had was the warm cheese puffs served with a smoked tomato romesco sauce. Oh my God! They were a fluffy, cheesy pastry that was made even better by dipping it into the sauce. I strongly recommend these as a starter. We actually considered ordering another serving of them :X


For our main dish, we shared the slow grilled tri-tip with charred broccoli and O+P béarnaise sauce. The meat was so tender and the béarnaise was the perfect add on to it. I also could not stop eating the broccoli. Natalie had to stop me, because little did I know, the best part of the meal was coming up.


What can I say about this chocolate rye pie? I'll start by saying Karen Hatfield, who is a renowned pastry chef, is behind it so you know it's going to be good. Second, this dessert was named on the list of top 10 desserts in LA by EaterLA. Finally, my honest opinion...it was definitely one of the best desserts I've had! It was super chocolatey and warm, so it was a great contrast to the cold malted ice cream on its side. The peanut crumble on top was also like icing on the cake of this amazing dessert.


Monday, August 17, 2015

Sweet Cherry Pie.

This past weekend, I was invited to one of my girlfriend's homes for afternoon coffee. I was super excited about getting together with my friends and I wanted to bring some homemade treats with me for us to share, but I was really in a time crunch and didn't have time to make a dessert from scratch.

Thank goodness I had some pie dough I made a few weeks ago stored away in my freezer and ready to go! I cut one corner and bought a canned cherry pie filling to go into my dough for the sake of time, but despite it not being homemade, it was still delicious.


I still wanted to put my own spin on the pie so instead of making one giant pie, I made mini individual sized pies! They were so cute and easy to distribute to whoever wants them without cutting into a whole pie and making a mess. I also made a lattice crust to give it that extra aesthetic to make it look like a miniature pie. It's super easy!...

After making the pie crust (recipe at end of post), use a cookie cutter or a cup to cut circles from the dough that are 4 inches circles. Place the circles into buttered muffin/cupcake tins and fill them with the cherry filling, 1/4 of a cup.

Photo courtesy of tablespoon.com. 

Then get to work on the lattice crust! Use a pizza cutter to cut small even strips of dough and use basic weaving over and under techniques to create a rustic look with the lattice. With this size of a pie, I used 6 dough strips in total: 3 horizontally and 3 vertically. Brush the top of the pie with an egg wash (a beaten egg) to give it that golden finish in the oven.

I baked these babies at 350 degrees for 25-30 minutes or until the crust is golden and the cherry filling is oozing and voila!


These could have come out a little prettier, as my lattice crust needs a little work, but these pies tasted like perfection. Little personal cherry pies with sweet, juicy cherries wrapped in a soft, buttery crust. These are sure to appeal to your guests tastebuds as well as their eyes!


Pie Crust Dough

Ingredients:

  • 2 cups all purpose flour (sifted)
  • 1 teaspoon salt
  • 2/3 cup butter (cold)
  • 5-7 tablespoons cold water 
Directions:
  1. Put flour into a mixing bowl with the butter.
  2. Using a pastry cutter or dough hook, cut the butter into the flour.
  3. Add the salt and water. 
  4. Mix until dough is formed.
  5. Cut the dough in half and wrap both separately in saran wrap.
  6. One can be used for freezing. The other should be put in the refrigerator for at least 30 minutes to cool before rolling it out to use. 

Miniature Cherry Pies

Ingredients:
  • Pie crust (recipe above)
  • 4 cups of pie filling (the filling can be altered at your choice i.e. apple, blueberry, peach, etc.)
  • 1 egg, whisked
Directions:
  1. Preheat oven to 350 degrees F. Grease 12 muffin tins with butter or cooking spray.
  2. Roll out a single pie crust on a flat surface. Use a large cookie cutter or a cup to cut out circles that are 4 inches. Press each circle into the bottom of the muffin tin so that a tiny rim of dough sticks out at the top. Repeat with the other 12 tins.
  3. Fill each cup with 1/4 cup pie filling, or until the filling nearly fills the cups. 
  4. Use the remaining dough to cover the tops of the pies. To make a lattice crust, use a pizza cutter to cut out thin strips of dough, then lace together to form a lattice. To make a standard crust, cut out a circle of dough large enough to cover the top of the crust. Use your fingers to gently press the top crust to the bottom crust until they stick together and no gaps remain. 
  5. Use a pastry brush to brush the tops of each pie with the whisked egg.
  6. Bake for 25-30 minutes, or until the crust is golden and the filling begins to bubble.
  7. Remove and let cool for at least 15 minutes. Then carefully use a knife to loosen the edges of each pie and gently lift each pie out. Serve immediately or cover and refrigerate. 

Tuesday, January 20, 2015

Fancy Ass Hot Chocolate.

Isn't it supposed to be getting warmer here in LA? I'm spoiled with the weather here, so I'm still trying to cope with it. One of the ways I do this is through comfort foods and drinks...and what's more comforting in this cold than hot chocolate?! The powdered stuff is okay, but nothing comes close to the way I make my "fancy ass" hot chocolate. I use milk and diced dark chocolate to make this magic happen.

Ingredients. 

So yummy!


Ingredients:

  • 2 cups of milk (I use skim milk, but whole milk makes it more decadent)
  • 1 stick of cinnamon 
  • 1 tablespoon of white granulated sugar
  • 1 teaspoon of vanilla extract
  • 3 ounces chopped dark chocolate
  • 1 pinch of Ancho chile powder (optional)
  • 1 pinch of salt
Directions:
  1. Heat the cinnamon stick in the milk  mixed with sugar and vanilla in a medium saucepan under low heat.
  2. Heat until the milk mixture gently simmers then take off the heat. Let it steep for 10-15 minutes.
  3. Remove the cinnamon stick and discard. 
  4. Chop the dark chocolate into small pieces and place in a microwave safe bowl. Heat the chocolate in the microwave 30 seconds at a time, mix after every 30 seconds until it is completely melted.
  5. Place the steeped milk over medium low heat and add the melted chocolate to it. Whisk until completely incorporated and mixture is hot. 
  6. Add a pinch of salt and Ancho chile powder.
  7. Divide between mugs and top with marshmallows.
Makes 2 cups of hot chocolate. 
Voila!

Wednesday, November 5, 2014

Trick or Treat.

If you know me, you know that Halloween is one of my favorite holidays and I love to celebrate it. Who says its just a holiday for kids? This year I really got into the spirit and tried out different activities to really celebrate. Because let's face it, nothing says fall like Halloween treats and crafts and getting a pumpkin spice latte at Starbucks simply won't cut it!


Decorating Pumpkins

I started out the week decorating pumpkins with my boyfriend. He's more a carver, whereas I like to paint and glue stuff on my pumpkins. To each his own, but all I'm gonna say is that I won a pumpkin carving/decorating contest at work with one of my pumpkins!

Obviously, the check engine light is my boyfriend's and very true to his character. I used washable tempera paint and sticky rhinestones and plastic spiders for my pumpkins. 


Halloween Witch Truffle Treats

Next, I wanted to make a Halloween themed treat for a work potluck and I also wanted to try my hand at making chocolate truffles so this was a great recipe for me to try out. They're little witch truffles!


The decorating needs a little perfecting but what I did was make the truffles by mixing 1.5 cups of bittersweet chocolate with 2/3 cup of cream, let it sit for a couple of hours and roll them into 1 inch balls and stuck a tic tac in it as a nose. I then dipped them in candy coating and topped them with an Oreo + Hershey's kiss hat.


Costumes

I was lucky enough to attended two costume parties this year. One was on actual Halloween day and one was a week before for my friend's birthday. Naturally, I had two costumes, both put together by me, instead of store bought. At my friend's birthday, I went as Audrey Hepburn from Breakfast at Tiffany's. My friends' costumes were so cute as well!


On actual Halloween day, I went to a party and I went all out with my and my boyfriend's costumes. I really like being creative with our costumes rather than typical girls' sexy costumes. Last year we were a sushi chef and a piece of sushi and the year before we were Ash Ketchum and Pikachu. And this year, we went as Roger Rabbit and Jessica Rabbit!


I made Roger's bow tie with felt and hot glue and pretty much bought every piece separately and put it together. It's so much more fun having a creative costume rather than a common store bought costume.


Rise of the Jack O'Lanterns

Finally, I went to The Rise of the Jack O'Lanterns at Descanso Gardens where over 5,000 carved pumpkins were put on display. The pumpkins had carvings of celebrities and popular TV shows and even multiple pumpkins put together to create elaborate works of art. Here are some of my favorite pieces I saw...


Tulips pumpkins. 
The details on this solar system is incredible!

Dinos. 
                      Sinatra and Walter. 

Chinese calendar. 
It's very faint but I see the Kardashiansss...you can't escape this family. 


I hope everyone had a happy Halloween!

Tuesday, October 21, 2014

Ladies Lunching.

For my best friend Natalie's birthday this year, she decided to throw a cute little lunch for us girls and it was so adorable! No detail was too small for her beautiful day, from the food to our place cards...everything was perfect. 

My place setting.

With the birthday girl. 

Our delicious lunch. 

Fruit and champs. 

The pretty, pretty table. 

Some of the desserts :).

Dessert table with nail polish as our party favors.

Happy Birthday Natalie!

After having our drinks and lunch, we each painted our own pumpkins. Overwhelmed by the cuteness? Yeah so were we!


Monday, June 2, 2014

Nutella Cheesecake Bars.

The other night, I decided to have some friends over to watch movies and I wanted to have some really delicious treats for us to snack on. I had an extra large jar of Nutella and decided to use it to make a cheesecake. I cut up the cheesecake into small bar in order for it to be portable/hand held for everyone to easily eat.

Ingredients.

I used Oreos for the crust instead of graham crackers because...well, who can't get enough of chocolate? So I layered the cheesecake into 3 levels: the Oreo crust, plain cheesecake, and Nutella cheesecake.

3 layers of deliciousness: Oreo crust, plain cheesecake, and Nutella cheesecake.


Recipe:

Ingredients:

  • 2 cups of Oreo crumbs
  • 1/4 cup melted, unsalted butter
  • 16 ounces of cream cheese at room temperature (very important!)
  • 2 eggs at room temperature
  • 1/2 cup granulated sugar
  • 1/4 cup + 1 tablespoon heavy cream
  • 1 teaspoon vanilla extract
  • 1/3 cup Nutella
Directions:
  1. Preheat oven to 325 degrees and butter an 8x8 baking dish and line with parchment paper making sure the parchment is well pressed in the corners.
  2. In a food processor, pulse Oreos until they become crumbs. Add in melted butter and pulse until moistened. Press Oreo mixture evenly into the bottom of the baking dish and bake until the crust is set about 12 minutes. Set aside.
  3. Mix cream cheese, eggs, sugar, 1/4 cup heavy cream, and vanilla until its smooth. Put 2/3 of the mixture in a bowl and set aside. Add Nutella  and a tablespoon of heavy cream to the remaining cream cheese mixture. Pulse until smooth.
  4. To assemble, spread the plain cheesecake mixture over the cooled Oreo crust. Then pour the Nutella cheesecake layer on top of the plain cheesecake layer and spread evenly. 
  5. Bake on the center rack of the oven for 35 minutes or until the center slightly jiggles.
  6. Remove from the oven and cool completely on a cooling rack. Then refrigerate for at least 3 hours.
  7. When ready to serve, lift the cheesecake out of the pan and cut into 16 squares and serve.
Voila!


Wednesday, February 26, 2014

Perfectly Sweet.

I took a break for an afternoon treat today at this spot my friend, Fadia, had told me about. I love sweets, but not so much when they are overly sweet, and this place had the perfect marriage of sugar and deliciousness in their pastries and desserts. It's even in the name...Perfectly Sweet! It's a small drive to Alhambra, but totally worth it. This sight is something to make your eyes widen 0_0

Dulce de Leche cake, fruit tart, and Tiramisu custard cup.

Wednesday, October 2, 2013

Donut Friend.

Donuts are one of America's classic desserts. It's not only police officers who love them. But donuts have kind of been put on the back burner in lieu of more popularized cupcakes and macarons. I mean let's face it, donuts haven't really made a comeback since Krispy Kreme came around and introduced a whole new level of decadence to the glazed donut. Anyway, since I love donuts, I've been on a search for some good donut shops. A lot of the places I've tried going to, however, have had long lines, ran out of their products, or just send their products to other bakeries. That's pretty snobby if you ask me...in fact, one of those places was named "Donut Snob".

Last week, however, I found out about Donut Friend...a quaint, new donut shop in Highland Park with some pretty amazing combinations of ingredients in their donuts and even a build your own option! The donuts were to die for and what I love about this place is that its not....well, snobby. They don't pride themselves on selling out of their products and they want to serve everyone who enters the store.

My friend opted for the build you own option, which was great. I indulged in Nutellavision and Walnut Voodoo. Both were amazing and I will definitely be back there again!
Nutellavision: Nutella and a dash of olive oil inside a traditional donut, topped with a sugar glaze.

Walnut Voodoo: a traditional donut stuffed with cream cheese, toasted walnuts, and a drizzle of maple syrup.

Sunday, September 22, 2013

Peanut Butter Cupcakes

The other day, I was feeling like I hadn't baked anything in a long time so I decided to make my favorite dessert...cupcakes! Now, like many others, I am guilty of taking the shortcut at times and using boxed cake mix. However, I thought some aspects of the cupcakes should have my own twist to them so I added some mini Reese's cups to the bottom of the cupcake and I made my own peanut butter frosting.


Peanut Butter Frosting:

Ingredients:
  • 1 cup confectioner's sugar
  • 1 cup creamy peanut butter
  • 5 tablespoons of unsalted butter at room temperature
  • 3/4 teaspoon pure vanilla extract
  • 1/4 teaspoon salt
  • 1/3 cup heavy cream
1. Mix confectioner's sugar, peanut butter, butter, vanilla, and salt on medium low speed until creamy.

2. Add the cream and mix on high speed until mixture is light and smooth.

(recipe courtesy of Ina Garten)


Tuesday, August 27, 2013

Labor Day Fun in Palm Springs

Labor Day is coming up this weekend and I know a lot of you out there are going to want to get out of town for some R&R. Palm Springs is a hot spot for many Los Angelites and the city, which I used to think was boring and monotonous, is becoming more and more trendy and fun. If you're going out there for the weekend, there are a few spots I want to share that are a definite must go!

Checked in at the Saguaro Resort.
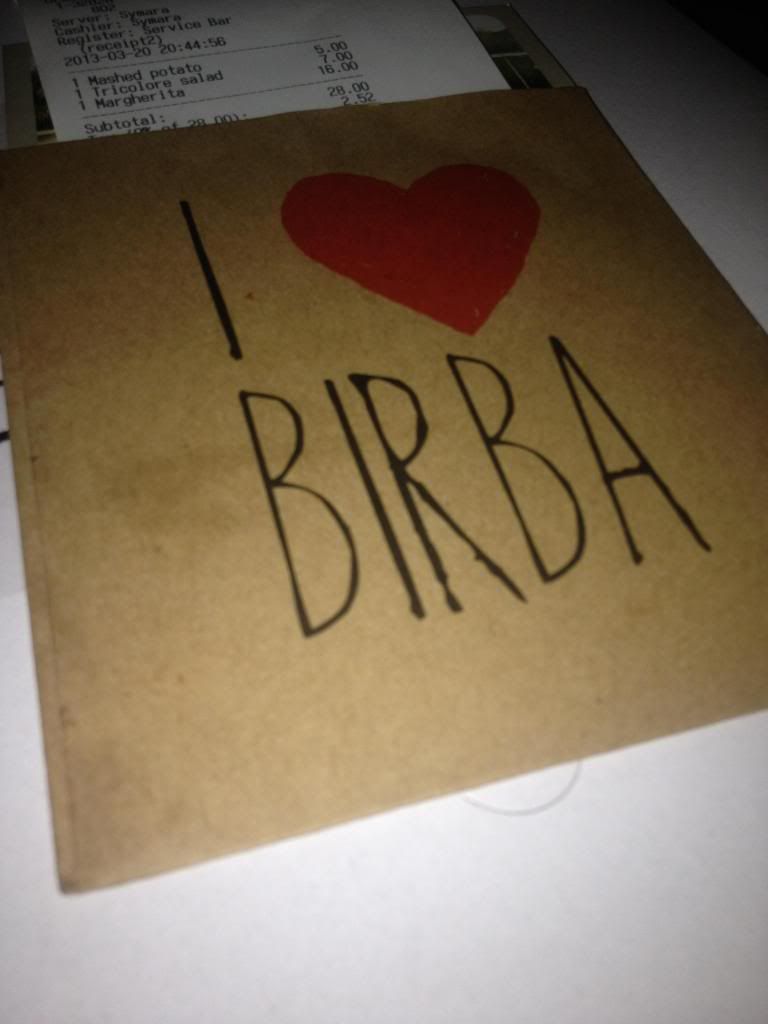
Dinner at Birba restaurant.

Burrata salad. 

I wish I took more pictures of our food here, but the Tricolore Salad is to die for and I've tried to recreate it at home many times. Also, they make the ricotta cheese fresh in the restaurant and is a great cheese to add to pizzas.

Then it was onto dessert at Crave Dessert Bar...
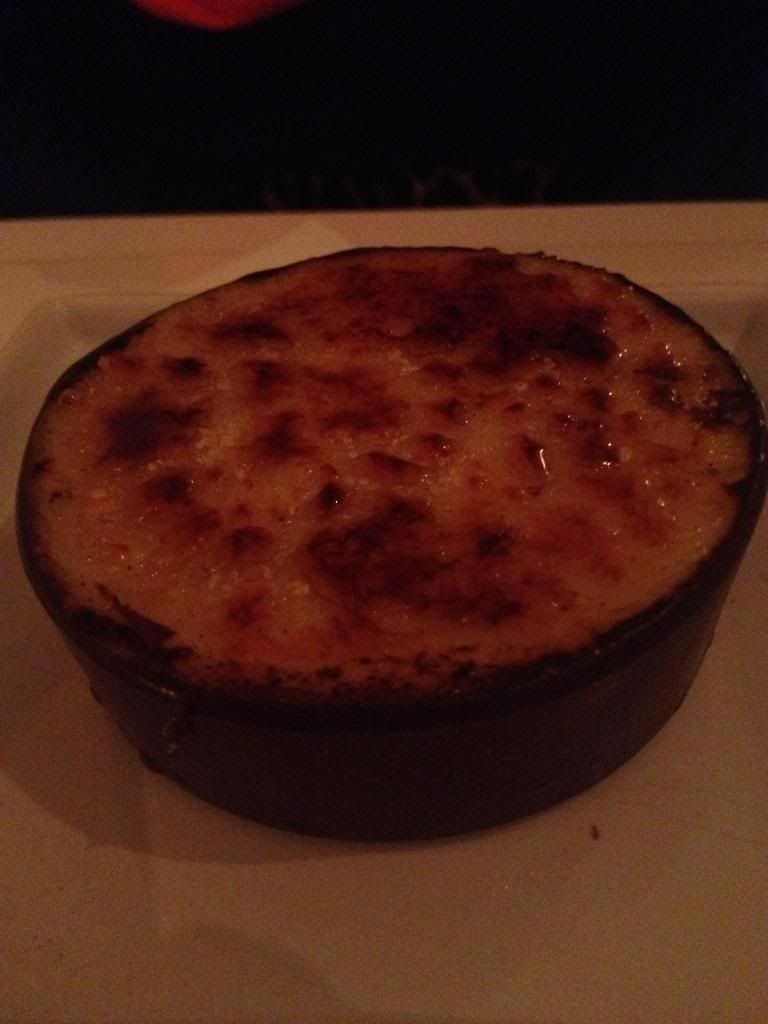
Creme brulee in a chocolate shell.

Blossoming hibiscus berry tea. 
Then it was onto breakfast the next morning at Cheeky's...


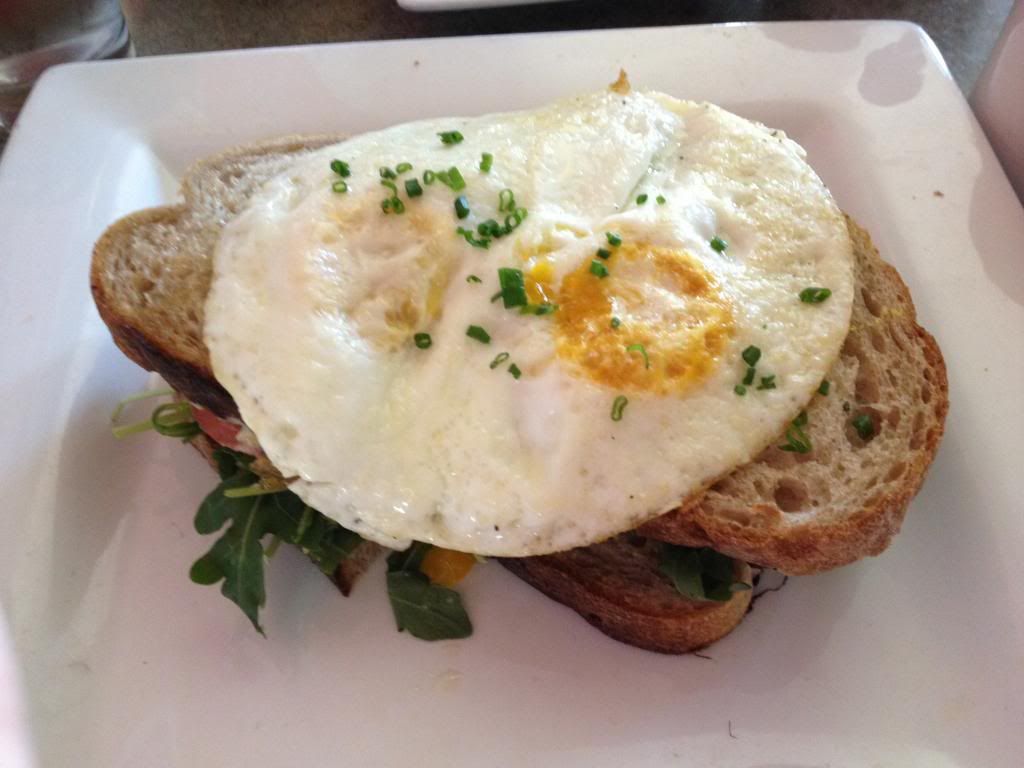
Two fried eggs on top of an heirloom tomato and arugula sandwich.

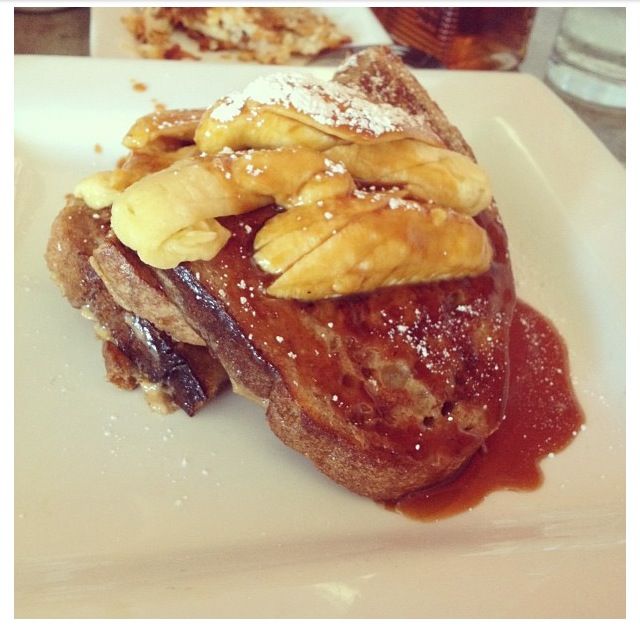
Sourdough french toast with salted caramel and bananas. 
Eggs Benedict with a twist. Poached eggs and hollandaise on top of bacon on top of buttermilk biscuits.

The menu at Cheeky's is seasonal and changes all the time, but these dishes are amazing and are greatly paired with honeydew mimosas and, of course, a bloody mary.